Best Method to Replace Toner in Your Printer
Replacing a toner cartridge is an essential skill for anyone who relies on a printer for daily tasks, whether in a home office or a corporate environment.
Understanding the Best Method to Replace Toner in Your Printer not only ensures optimal printer performance but also contributes to cost efficiency and sustainability.
As printers continue to evolve, with an array of models and technologies available, knowing the correct procedure for your specific device is crucial.
This article aims to provide comprehensive guidance on the Best Method to Replace Toner Cartridge in a Printer, encompassing insights into preparation, safety measures, and proper disposal of used cartridges.
We will also explore common pitfalls to avoid and best practices for maintaining your printer’s longevity.
By following these recommendations, users can enhance print quality, minimize downtime, and extend the life of their printing equipment.
Whether you are a seasoned professional or a novice, mastering the art of toner cartridge replacement not only empowers you as a printer user but also elevates the overall efficiency of your printing tasks.
Join us as we delve into the step-by-step process that will simplify this routine yet essential maintenance task.
Table of Contents Best Method to Replace Toner in Your Printer
Gather necessary tools and supplies beforehand
Having the right tools and supplies readily available is essential for ensuring a smooth and efficient toner cartridge replacement process.
It is advisable to collect items such as a new toner cartridge, gloves to maintain cleanliness, and a microfiber cloth to handle components without causing damage.
Additionally, a flathead screwdriver may be necessary for certain printer models, while a dust brush can help remove any debris from the printer area to prevent contamination.
By preparing these items in advance, one can minimize interruptions during the replacement procedure and maintain an organized workspace.
Furthermore, reviewing the specific requirements of the printer model in question can also guide the selection of necessary materials.
Checking the manufacturer’s guidelines will ensure that the correct toner cartridge is obtained and any special tools needed for the task are on hand.
This level of preparation not only expedites the cartridge replacement process but also enhances the overall effectiveness of the task, reducing the likelihood of errors that could lead to further complications or damage.
Turn off printer and unplug it
Before initiating the replacement of the toner cartridge, it is crucial to safely power down the printer and disconnect it from the electrical outlet.
This step not only helps prevent electrical hazards but also ensures that there is no risk of accidental activation during the cartridge change.
By shutting down the device, you can work more comfortably and without the concern of any moving parts or electronic components interfering with the process.
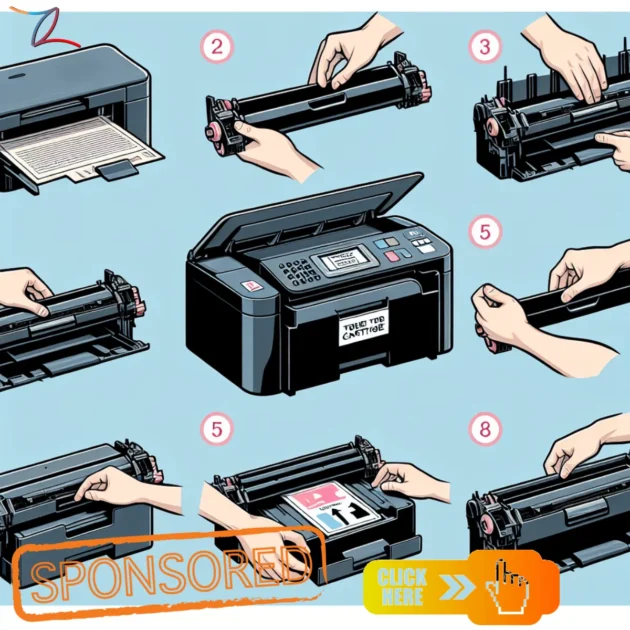
Once the printer is turned off and unplugged, you can proceed with opening the printer access door to reach the toner compartment.
This precautionary measure safeguards both the user and the printer itself, fostering a controlled environment where maintenance can be conducted efficiently and effectively.
Taking the time to follow these safety protocols sets the stage for a successful toner cartridge replacement.
Open the printer access door carefully
Gently lift the access door, ensuring that you are not applying excessive force, as this could damage the hinges or cause misalignment.
It is advisable to familiarize yourself with the printer’s design, as some models may feature latch mechanisms or specific release buttons that need to be pressed before the door can be opened.
By handling the access door with care, you minimize the risk of injury and prevent potential damage to internal components, allowing for a smooth and straightforward cartridge replacement process.
Once the access door is fully open, take a moment to inspect the interior of the printer for any debris or obstructions that may interfere with the new cartridge installation.
This step is particularly important, as dirt or leftover fragments from the old cartridge can affect print quality and performance.
With the access door properly opened and the area cleared, you are now ready to proceed with the installation of the new toner cartridge, ensuring optimal performance and longevity of the printer.
Remove the old toner cartridge gently
Approach the removal of the old toner cartridge with care to avoid any spillage of toner, which could create a mess and potentially harm internal components.
Grip the cartridge firmly but gently, ensuring you do not squeeze it too tightly as this could lead to inadvertent damage.
Pull the cartridge straight out along its designated path, avoiding any twisting motions that might cause misalignment or damage to the printer’s internal mechanisms.
It is advisable to place the old cartridge in a bag or designated disposal container immediately after removal to prevent any accidental spillage.
Once the cartridge is removed, take a moment to inspect the cartridge compartment for any remnants of toner that might need cleaning.
Ensuring this area is free from debris will enhance the performance of the new cartridge and maintain the printer’s longevity.
By handling the old cartridge cautiously and maintaining a clean work environment, you facilitate a seamless transition to the installation of the new toner, optimizing print quality and extending the life of your printer.
Unbox the new toner cartridge
Carefully unpack the new toner cartridge from its packaging, taking care to avoid any contact with the imaging drum or any other sensitive components.
It is essential to remove any protective seals or tape that may be present, as these are designed to safeguard the cartridge during transit.
Holding the cartridge by its ends, avoid touching the surface of the toner itself, as oils from your fingers can negatively impact print quality.
Before inserting the new cartridge into the printer, gently shake it side to side to evenly distribute the toner within the cartridge.
This step helps prevent streaks or uneven printing that may occur if the toner is unevenly settled.
Ensure that the cartridge aligns correctly with the guide rails in the printer, and push it firmly until it clicks into place, indicating a secure fit.
By following these precautions, you will maximize the efficiency of the new toner cartridge while safeguarding your equipment.
Shake the new toner cartridge evenly
Distributing the toner evenly within the cartridge is a crucial step that can significantly enhance printing performance.
Shaking the cartridge gently ensures that the toner is well-mixed and ready for use, reducing the likelihood of print defects such as fading or banding.
This simple action not only optimizes the toner flow but also helps maintain a consistent quality throughout the lifespan of the cartridge, contributing to sharper text and clearer images.
Neglecting to perform this essential step can lead to subpar printing results, as settled toner may cause uneven coverage on the page.
Therefore, taking a moment to shake the cartridge before installation is a small but effective measure that can save time and resources in the long run.
It reflects attention to detail and a commitment to achieving the best possible outcomes from the printing process.
Align cartridge with printer tracks
Careful alignment of the cartridge with the printer tracks is critical for ensuring a seamless installation.
Proper alignment allows the cartridge to engage with the printer’s internal mechanisms effectively, facilitating optimal toner transfer during operation.
If the cartridge is misaligned, it can lead to operational issues such as jamming, leaks, or inconsistent print quality.
To achieve correct alignment, it is advisable to gently guide the cartridge into the designated slot without forcing it.
Listen for a click or feel for a snug fit, indicating that the cartridge is securely in place.
This attention to detail not only aids in avoiding potential malfunctions but also contributes to the longevity of both the cartridge and the printer, allowing for a smoother and more reliable printing experience.
Insert the cartridge until it clicks
The audible confirmation of a click serves as an essential indicator that the cartridge is firmly seated within the printer.
This sound signifies that the cartridge has engaged properly with the printer’s locking mechanism, ensuring that it will function at peak efficiency.
Neglecting this step can lead to insufficient contact between the cartridge and the printer’s components, which may result in failures such as incomplete printing or the inability to recognize the cartridge altogether.
In addition to preventing operational issues, achieving this secure fit is vital for maintaining the integrity of the toner delivery system.
A well-installed cartridge minimizes the risk of toner spills and contamination, promoting cleaner prints and reducing maintenance needs.
Therefore, a deliberate approach to inserting the cartridge until a distinct click is heard not only enhances performance but also safeguards the printer from potential damage caused by improperly installed components.
Close the printer access door securely
Ensuring that the printer access door is closed securely is a critical step in the overall maintenance and functionality of the printer.
This action not only protects the internal components from dust and debris but also helps to maintain optimal temperature and humidity levels inside the device.
A properly closed access door ensures that the printer can operate efficiently, reducing the likelihood of malfunctions or performance issues that could arise from external factors.
Furthermore, a secured access door is integral to the printer’s safety mechanisms.
Many modern printers are designed to halt operation if the access door is open, preventing potential injuries and damage.
This feature serves as a safeguard, ensuring that all components remain properly aligned and function as intended.
Therefore, verifying that the access door is firmly closed is essential for both operational efficiency and the longevity of the printer.
Power on printer and test
After ensuring that the printer’s access door is securely closed, the next essential step is to power on the device.
This process involves connecting the printer to an electrical outlet and switching it on, which activates its internal systems.
Upon powering up, it is advisable to observe any initialization sounds or indicator lights that signify the printer is functioning correctly.
This initial check can help identify potential issues before proceeding with any printing tasks.
In addition to powering up the printer, conducting a test print is a prudent practice to confirm that the device is operating as expected.
A test print not only verifies that the toner cartridge has been installed correctly and is functioning properly but also assures that the printer’s settings are configured accurately.
Any anomalies during the test print can serve as early indicators of underlying problems, allowing for timely troubleshooting and adjustments, thereby ensuring consistent and high-quality output in subsequent printing activities.
In conclusion, replacing a toner cartridge in a printer is a straightforward process that, when done correctly, can significantly enhance your printing efficiency and quality.
By following the outlined steps—preparing your workspace, ensuring compatibility with your printer, and properly disposing of the old cartridge—you can streamline your printing tasks and minimize downtime.
Regular maintenance and timely replacements not only extend the life of your printer but also contribute to consistent, high-quality output.
By adhering to these best practices, you can ensure that your printing operations remain smooth and effective, ultimately supporting your productivity goals.


